Node.js JWT 인증 시스템 완성하기 Part 3: React 프론트엔드 구현
🔗 시리즈 연결
이 포스트는 JWT 인증 시스템 시리즈의 Part 3입니다.
- Part 1: 기본 JWT 인증 시스템 구축하기
- Part 2: 고급 JWT 인증 기능
- Part 3: React 프론트엔드 구현 ← 현재 글
🤔 드디어 프론트엔드 차례!
Part 1, 2에서 완성한 백엔드 JWT 인증 시스템… 이제 완벽하게 작동하는데 한 가지 문제가 있어요.
“사용자가 이걸 어떻게 사용하죠? 😅”
지금까지는 Thunder Client로 API를 테스트했지만, 일반 사용자들이 터미널에서 curl을 칠 수는 없잖아요!
이번 Part 3에서는 React를 사용해서 실제 웹사이트처럼 예쁜 로그인 화면을 만들어보겠습니다! 🎨
🎯 구현할 기능들
- ✅ React 프로젝트 설정 🏗️
- ✅ 로그인/회원가입 폼 컴포넌트 📝
- ✅ Context API를 활용한 전역 상태 관리 🗃️
- ✅ Axios를 이용한 API 통신 🌐
- ✅ 모던하고 깔끔한 UI/UX ✨
🏗️ Step 1: React 프로젝트 설정
먼저 Create React App으로 프론트엔드 프로젝트를 생성해보겠습니다! 🎉
1
2
3
npx create-react-app frontend
cd frontend
npm install axios
📁 프로젝트 구조
1
2
3
4
5
6
7
8
9
10
11
12
13
14
frontend/
├── src/
│   ├── components/
│   │   ├── Auth/
│   │   │   ├── LoginForm.jsx
│   │   │   ├── RegisterForm.jsx
│   │   │   └── Auth.css
│   │   ├── context/
│   │   │   └── AuthContext.jsx
│   │   └── services/
│   │       └── api.js
│   ├── App.js
│   └── index.js
└── package.json
🌐 Step 2: API 통신 설정
백엔드와의 통신을 위한 Axios 설정을 먼저 해보겠습니다! 🔗
src/components/services/api.js
1
2
3
4
5
6
7
8
9
10
11
12
13
14
15
import axios from 'axios';

const api = axios.create({
    baseURL: 'http://localhost:5000/api',
    headers: { 'Content-Type': 'application/json' },
});

// 요청 인터셉터로 Authorization 헤더 자동 추가
api.interceptors.request.use(config => {
    const token = localStorage.getItem('accessToken');
    if (token) config.headers.Authorization = `Bearer ${token}`;
    return config;
});

export default api;
💡 핵심 포인트:
- 🎯
baseURL로 백엔드 서버 주소 설정 - 🔐 요청 인터셉터로 모든 요청에 JWT 토큰 자동 추가
- 💾 localStorage에서 토큰을 가져와 Authorization 헤더에 포함
🗃️ Step 3: 전역 상태 관리 - AuthContext
React Context API를 사용해 인증 상태를 전역으로 관리하겠습니다!
src/components/context/AuthContext.jsx
1
2
3
4
5
6
7
8
9
10
11
12
13
14
15
16
17
18
19
20
21
22
23
24
25
26
27
28
29
30
31
32
33
34
35
36
37
38
39
40
41
42
43
44
import React, { createContext, useState, useEffect } from 'react';
import api from '../services/api';

export const AuthContext = createContext();

export const AuthProvider = ({ children }) => {
    const [user, setUser] = useState(null);

    // 앱 시작할 때 저장된 토큰으로 사용자 정보 불러오기
    useEffect(() => {
        const token = localStorage.getItem('accessToken');
        if (!token) return;

        api.get('/auth/me')
            .then(res => setUser(res.data.user))
            .catch(() => {
                localStorage.removeItem('accessToken');
                setUser(null);
            });
    }, []);

    // 로그인 함수
    const login = async (email, password) => {
        const res = await api.post('/auth/login', { email, password });
        const { accessToken, data: { user } } = res.data;

        localStorage.setItem('accessToken', accessToken);
        setUser(user);
        return res;
    };

    // 로그아웃 함수
    const logout = async () => {
        await api.post('/auth/logout'); // 서버에 로그아웃 알리기
        localStorage.removeItem('accessToken');
        setUser(null);
    };

    return (
        <AuthContext.Provider value={{ user, login, logout }}>
            {children}
        </AuthContext.Provider>
    );
};
🔧 핵심 기능:
- 📊
useState로 사용자 정보 상태 관리 - 🔄
useEffect로 페이지 새로고침 시 토큰 확인 및 사용자 정보 복원 - 🚪
login,logout함수로 인증 상태 변경
📝 Step 4: 로그인 폼 컴포넌트
사용자가 로그인할 수 있는 예쁜 폼을 만들어보겠습니다!
src/components/Auth/LoginForm.jsx
1
2
3
4
5
6
7
8
9
10
11
12
13
14
15
16
17
18
19
20
21
22
23
24
25
26
27
28
29
30
31
32
33
34
35
36
37
38
39
40
41
42
43
44
45
46
47
48
49
50
51
52
53
54
55
56
57
58
59
60
61
62
63
64
65
66
67
68
69
70
71
72
73
74
75
76
77
78
79
80
81
82
83
84
85
86
87
88
89
90
91
92
93
94
95
96
import React, { useState, useContext } from "react";
import { AuthContext } from "../context/AuthContext";
import "./Auth.css";

const LoginForm = ({ onSwitchToRegister }) => {
	const [formData, setFormData] = useState({
		email: "",
		password: "",
	});
	const [loading, setLoading] = useState(false);
	const [error, setError] = useState("");

	const { login } = useContext(AuthContext);

	const handleChange = (e) => {
		setFormData({
			...formData,
			[e.target.name]: e.target.value,
		});
		if (error) setError(""); // 입력 시 에러 메시지 초기화
	};

	const handleSubmit = async (e) => {
		e.preventDefault();
		setLoading(true);
		setError("");

		try {
			await login(formData.email, formData.password);
		} catch (err) {
			setError(err.response?.data?.message || "로그인에 실패했습니다.");
		} finally {
			setLoading(false);
		}
	};

	return (
		<div className="auth-container">
			<div className="auth-card">
				<h1 className="auth-title">로그인</h1>
				<p className="auth-subtitle">계정에 로그인하세요</p>

				{error && <div className="error-message">{error}</div>}

				<form onSubmit={handleSubmit} className="auth-form">
					<div className="input-group">
						<label htmlFor="email">이메일</label>
						<input
							type="email"
							id="email"
							name="email"
							value={formData.email}
							onChange={handleChange}
							required
							placeholder="your@email.com"
						/>
					</div>

					<div className="input-group">
						<label htmlFor="password">비밀번호</label>
						<input
							type="password"
							id="password"
							name="password"
							value={formData.password}
							onChange={handleChange}
							required
							placeholder="••••••••"
						/>
					</div>

					<button
						type="submit"
						className="auth-button"
						disabled={loading}
					>
						{loading ? "로그인 중..." : "로그인"}
					</button>
				</form>

				<p className="auth-switch">
					계정이 없으신가요?{" "}
					<button
						type="button"
						className="switch-button"
						onClick={onSwitchToRegister}
					>
						회원가입
					</button>
				</p>
			</div>
		</div>
	);
};

export default LoginForm;
👤 Step 5: 회원가입 폼 컴포넌트
회원가입 기능을 위한 폼도 만들어보겠습니다!
src/components/Auth/RegisterForm.jsx
1
2
3
4
5
6
7
8
9
10
11
12
13
14
15
16
17
18
19
20
21
22
23
24
25
26
27
28
29
30
31
32
33
34
35
36
37
38
39
40
41
42
43
44
45
46
47
48
49
50
51
52
53
54
55
56
57
58
59
60
61
62
63
64
65
66
67
68
69
70
71
72
73
74
75
76
77
78
79
80
81
82
83
84
85
86
87
88
89
90
91
92
93
94
95
96
97
98
99
100
101
102
103
104
105
106
107
108
109
110
111
112
113
114
115
116
117
import React, { useState } from "react";
import api from "../services/api";
import "./Auth.css";

const RegisterForm = ({ onSwitchToLogin }) => {
	const [formData, setFormData] = useState({
		username: "",
		email: "",
		password: "",
	});
	const [loading, setLoading] = useState(false);
	const [error, setError] = useState("");
	const [success, setSuccess] = useState("");

	const handleChange = (e) => {
		setFormData({
			...formData,
			[e.target.name]: e.target.value,
		});
		if (error) setError("");
		if (success) setSuccess("");
	};

	const handleSubmit = async (e) => {
		e.preventDefault();
		setLoading(true);
		setError("");
		setSuccess("");

		try {
			await api.post("/auth/register", formData);
			setSuccess("회원가입이 완료되었습니다! 로그인해주세요.");
			setTimeout(() => {
				onSwitchToLogin();
			}, 2000);
		} catch (err) {
			setError(err.response?.data?.message || "회원가입에 실패했습니다.");
		} finally {
			setLoading(false);
		}
	};

	return (
		<div className="auth-container">
			<div className="auth-card">
				<h1 className="auth-title">회원가입</h1>
				<p className="auth-subtitle">새 계정을 만드세요</p>

				{error && <div className="error-message">{error}</div>}
				{success && <div className="success-message">{success}</div>}

				<form onSubmit={handleSubmit} className="auth-form">
					<div className="input-group">
						<label htmlFor="username">사용자명</label>
						<input
							type="text"
							id="username"
							name="username"
							value={formData.username}
							onChange={handleChange}
							required
							placeholder="사용자명을 입력하세요"
						/>
					</div>

					<div className="input-group">
						<label htmlFor="email">이메일</label>
						<input
							type="email"
							id="email"
							name="email"
							value={formData.email}
							onChange={handleChange}
							required
							placeholder="your@email.com"
						/>
					</div>

					<div className="input-group">
						<label htmlFor="password">비밀번호</label>
						<input
							type="password"
							id="password"
							name="password"
							value={formData.password}
							onChange={handleChange}
							required
							placeholder="••••••••"
							minLength={6}
						/>
					</div>

					<button
						type="submit"
						className="auth-button"
						disabled={loading}
					>
						{loading ? "가입 중..." : "회원가입"}
					</button>
				</form>

				<p className="auth-switch">
					이미 계정이 있으신가요?{" "}
					<button
						type="button"
						className="switch-button"
						onClick={onSwitchToLogin}
					>
						로그인
					</button>
				</p>
			</div>
		</div>
	);
};

export default RegisterForm;
🎨 Step 6: 스타일링
모던하고 깔끔한 디자인을 위한 CSS를 작성하겠습니다!
src/components/Auth/Auth.css
1
2
3
4
5
6
7
8
9
10
11
12
13
14
15
16
17
18
19
20
21
22
23
24
25
26
27
28
29
30
31
32
33
34
35
36
37
38
39
40
41
42
43
44
45
46
47
48
49
50
51
52
53
54
55
56
57
58
59
60
61
62
63
64
65
66
67
68
69
70
71
72
73
74
75
76
77
78
79
80
81
82
83
84
85
86
87
88
89
90
91
92
93
94
95
96
97
98
99
100
101
102
103
104
105
106
107
108
109
110
111
112
113
114
115
116
117
118
119
120
121
122
123
124
125
126
127
128
129
.auth-container {
	display: flex;
	justify-content: center;
	align-items: center;
	min-height: 100vh;
	background: linear-gradient(135deg, #667eea 0%, #764ba2 100%);
}

.auth-card {
	background: white;
	padding: 2.5rem;
	border-radius: 12px;
	box-shadow: 0 10px 30px rgba(0, 0, 0, 0.1);
	width: 100%;
	max-width: 400px;
	margin: 1rem;
}

.auth-title {
	text-align: center;
	margin-bottom: 0.5rem;
	color: #333;
	font-size: 2rem;
	font-weight: 600;
}

.auth-subtitle {
	text-align: center;
	margin-bottom: 2rem;
	color: #666;
	font-size: 0.95rem;
}

.auth-form {
	display: flex;
	flex-direction: column;
	gap: 1.5rem;
}

.input-group {
	display: flex;
	flex-direction: column;
	gap: 0.5rem;
}

.input-group label {
	font-weight: 500;
	color: #333;
	font-size: 0.9rem;
}

.input-group input {
	padding: 0.85rem;
	border: 2px solid #e1e5e9;
	border-radius: 8px;
	font-size: 1rem;
	transition: all 0.2s ease;
}

.input-group input:focus {
	outline: none;
	border-color: #667eea;
	box-shadow: 0 0 0 3px rgba(102, 126, 234, 0.1);
}

.auth-button {
	width: 100%;
	padding: 0.85rem;
	background: linear-gradient(135deg, #667eea 0%, #764ba2 100%);
	color: white;
	border: none;
	border-radius: 8px;
	font-size: 1rem;
	font-weight: 600;
	cursor: pointer;
	transition: all 0.2s ease;
	margin-top: 0.5rem;
}

.auth-button:hover:not(:disabled) {
	transform: translateY(-1px);
	box-shadow: 0 5px 15px rgba(102, 126, 234, 0.3);
}

.auth-button:disabled {
	opacity: 0.7;
	cursor: not-allowed;
	transform: none;
}

.auth-switch {
	text-align: center;
	margin-top: 1.5rem;
	color: #666;
	font-size: 0.9rem;
}

.switch-button {
	background: none;
	border: none;
	color: #667eea;
	cursor: pointer;
	text-decoration: underline;
	font-weight: 500;
}

.switch-button:hover {
	color: #764ba2;
}

.error-message {
	background: #fee;
	color: #c33;
	padding: 0.75rem;
	border-radius: 6px;
	border: 1px solid #fcc;
	margin-bottom: 1rem;
	font-size: 0.9rem;
}

.success-message {
	background: #efe;
	color: #363;
	padding: 0.75rem;
	border-radius: 6px;
	border: 1px solid #cfc;
	margin-bottom: 1rem;
	font-size: 0.9rem;
}
🏠 Step 7: 메인 App 컴포넌트
로그인과 회원가입 폼을 전환할 수 있는 메인 컴포넌트를 만듭니다!
src/App.js
1
2
3
4
5
6
7
8
9
10
11
12
13
14
15
16
17
18
19
20
21
22
import React, { useState } from "react";
import LoginForm from "./components/Auth/LoginForm";
import RegisterForm from "./components/Auth/RegisterForm";
import "./App.css";

function App() {
	const [currentView, setCurrentView] = useState("login");

	return (
		<div className="App">
			{currentView === "login" ? (
				<LoginForm
					onSwitchToRegister={() => setCurrentView("register")}
				/>
			) : (
				<RegisterForm onSwitchToLogin={() => setCurrentView("login")} />
			)}
		</div>
	);
}

export default App;
🔌 Step 8: AuthProvider 연결
전역 상태 관리를 위해 AuthProvider를 연결합니다!
src/index.js
1
2
3
4
5
6
7
8
9
10
11
12
13
14
import React from "react";
import ReactDOM from "react-dom/client";
import "./index.css";
import App from "./App";
import { AuthProvider } from "./components/context/AuthContext";

const root = ReactDOM.createRoot(document.getElementById("root"));
root.render(
	<React.StrictMode>
		<AuthProvider>
			<App />
		</AuthProvider>
	</React.StrictMode>
);
🚀 Step 9: 실행 및 테스트
이제 드디어 우리가 만든 프론트엔드를 실행해볼 시간입니다! 🎉
🔧 백엔드 서버 실행
1
2
# backend 폴더에서
npm run dev
⚛️ 프론트엔드 서버 실행
1
2
# frontend 폴더에서
npm start
✅ 실행 결과
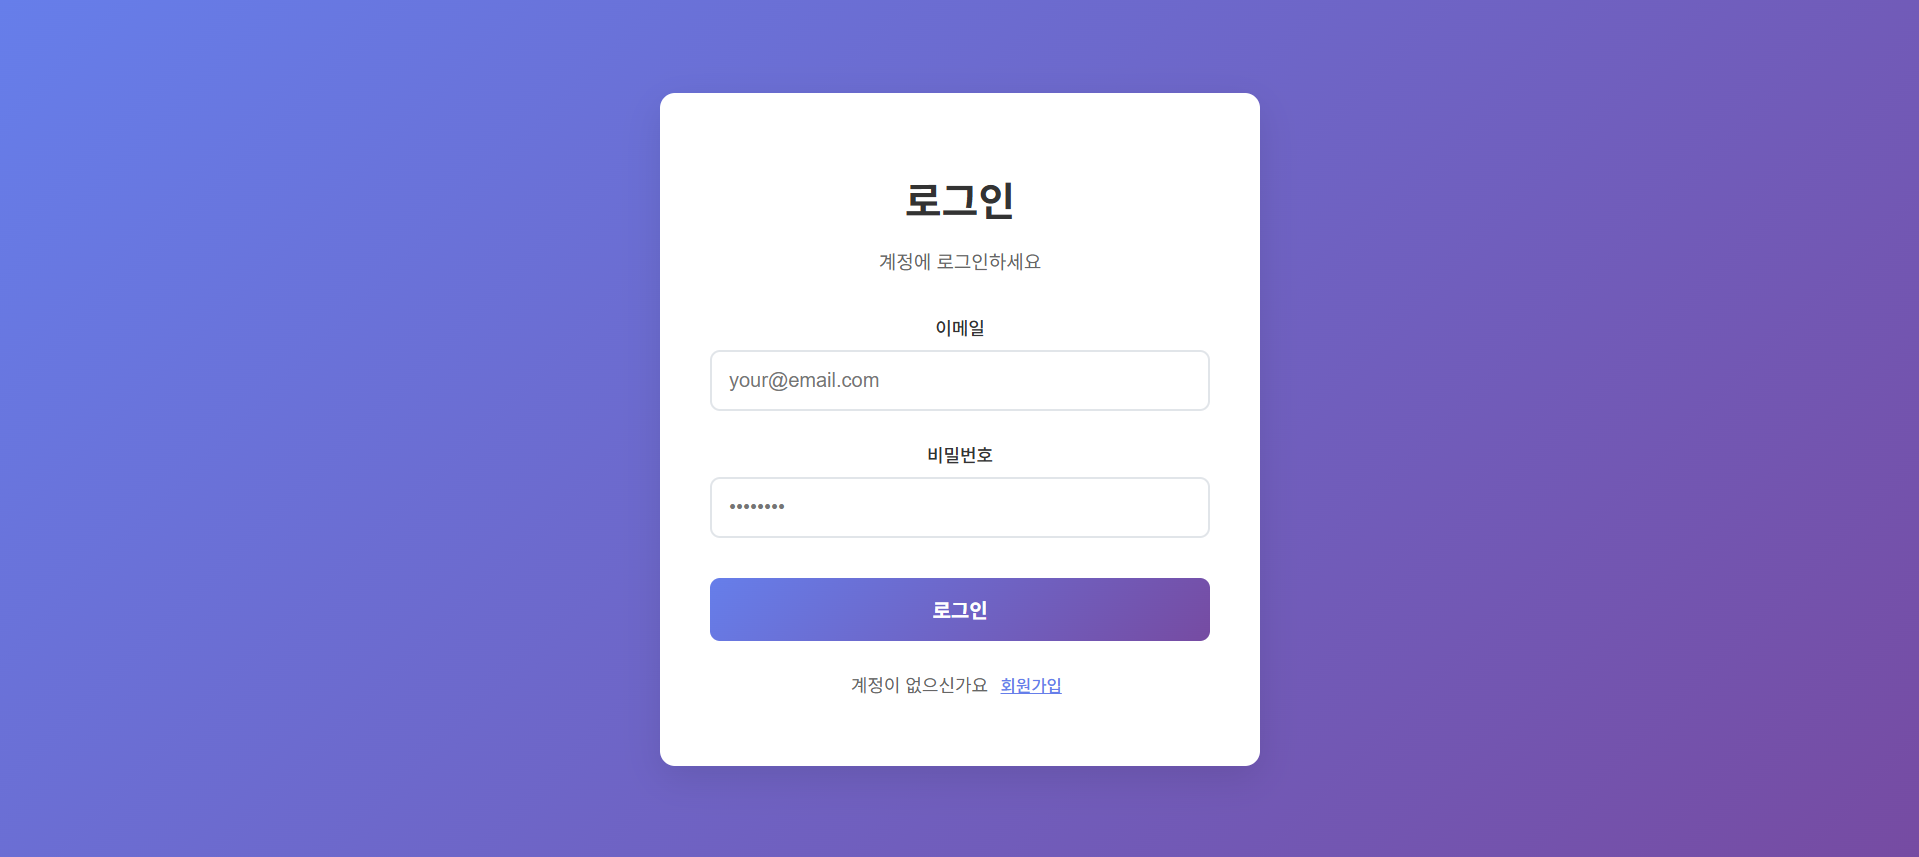

🧪 테스트 시나리오
- 회원가입 테스트 📝
- http://localhost:3000 접속
- “회원가입” 클릭
- 정보 입력 후 가입
- 성공 메시지 확인
- 로그인 테스트 🔑
- 가입한 계정으로 로그인
- 네트워크 탭에서 JWT 토큰 확인
- localStorage에 토큰 저장 확인
- 에러 처리 테스트 ❌
- 잘못된 정보로 로그인 시도
- 에러 메시지 표시 확인
💡 핵심 포인트 정리
1. 컴포넌트 설계 🏗️
- 관심사의 분리: 로그인/회원가입 폼을 별도 컴포넌트로 분리
- 재사용성: 공통 CSS 클래스와 스타일 적용
- 상태 관리: 각 폼의 로딩, 에러 상태 독립적 관리
2. 상태 관리 패턴 📊
- Context API: 전역 인증 상태 관리
- 로컬 스토리지: 토큰 영속성 보장
- 자동 복원: 페이지 새로고침 시 인증 상태 유지
3. API 통신 패턴 🌐
- Axios 인터셉터: 모든 요청에 토큰 자동 추가
- 에러 처리: try-catch로 네트워크 에러 핸들링
- 사용자 피드백: 로딩 상태와 에러 메시지 표시
4. UX 고려사항 ✨
- 로딩 상태: 버튼 비활성화로 중복 요청 방지
- 실시간 피드백: 입력 시 에러 메시지 자동 클리어
- 자동 전환: 회원가입 성공 시 로그인 폼으로 이동
🎉 마무리
Part 3에서는 React를 사용해 JWT 인증 시스템의 프론트엔드를 완성했습니다! 🚀
Context API로 전역 상태를 관리하고, Axios로 백엔드와 통신하며, 모던한 UI/UX를 구현했어요.
🔮 다음 Part 4에서는
- 🎯 대시보드 컴포넌트 구현
- 🛡️ 보호된 라우트 (React Router)
- 🔄 자동 토큰 갱신 기능
- 📱 반응형 디자인 개선
현재까지의 코드는 GitHub 리포지토리에서 확인할 수 있습니다! 🔗
💡 질문이나 피드백이 있으시면 댓글로 남겨주세요! 😊
다음 포스팅에서 더 고급 기능들을 다뤄보겠습니다! 🚀