간단한 날씨 위젯 코딩 #2 [초기 화면 레이아웃 세팅 / Java Script 미니 프로젝트]
안녕하세요🖐️
오늘은 날씨 위젯을 실행하면 나오는 초기 화면의 레이아웃을 세팅해보도록 하겠습니다!
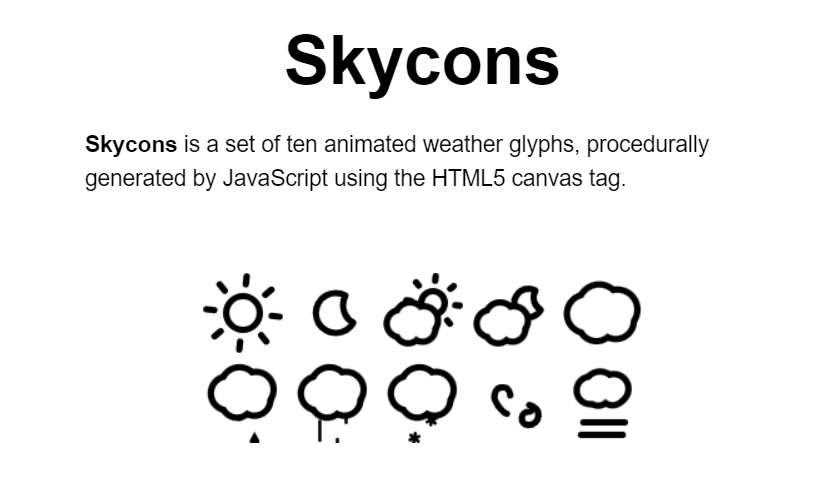
먼저 이미지를 넣어서 날씨를 표현해보도록 하겠습니다.
이미지를 고르려고 구글링을 하다가 Skycons라는 걸 발견했는데, animated되는 날씨 이미지가 마음에 들어서 이걸 사용했습니다.
사전에 필요한 파일
Skycons를 사용하려면 skycons.js 파일이 필요합니다.
다음 링크에서 zip 파일을 다운한 후, skycons.js 파일만 복사해서 자신의 프로젝트 파일로 가져옵니다!
이렇게 설정해 주시면 됩니다!
날씨 초기 화면에 Skycons 아이콘 삽입
script.js
1
2
3
4
var icons = new Skycons({ "color": "black" });

icons.add("weather-icon", Skycons.CLEAR_DAY);
icons.play();
Skycons 객체를 생성하고, 맑은 날씨 아이콘을 추가한 후, 애니메이션을 재생하는 코드를 하나 작성해 줍니다.
index.html
1
2
3
4
5
6
7
8
9
10
11
12
13
14
15
16
17
<body>
    <div class="container">
        <div class="header">
            <div class="search-box">
                <input type="text" placeholder="Search" class="input-box">
                <button class="fa-solid fa-magnifying-glass" id="searchBtn"></button>
                <button class="fa-solid fa-location-dot" id="locationBtn"></button>
            </div>
        </div>
        <div class="weather-body">
            <canvas id="weather-icon" width="200" height="200" alt="Weather Image" class="weather-img"></canvas>
        </div>
    </div>
    <script src="skycons.js"></script>
    <script src='script.js'></script>
    <script src="https://kit.fontawesome.com/당신의 킷 주소.js" crossorigin="anonymous"></script>
</body>
다음으로 skycons을 사용하기 위해서 skycons 라이브러리를 html 코드에 포함하고 weather-body 클래스 안에 weather-icon 캔버스를 생성해줘서 날씨 아이콘이 나타나도록 코딩해주었습니다!
style.css
1
2
3
4
5
6
7
8
9
10
11
12
.weather-body {
    display: flex;
    justify-content: center;
    align-items: center;
    flex-direction: column;
    margin-block: 20px;
    padding-top: 10px;
}

.weather-body img {
    width: 60%;
}
css 파일을 수정해서 날씨 아이콘을 중앙에 배치했고, 이미지 크기를 조정해 주었습니다.
구현 결과
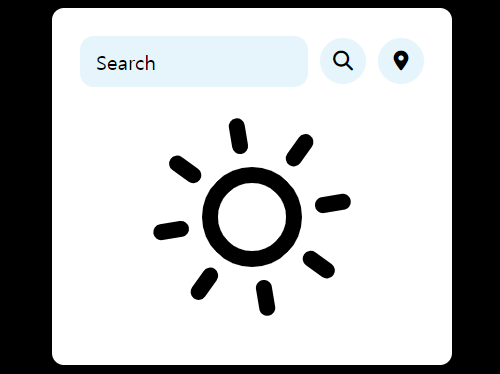
아이콘이 잘 움직이네요 ㅎㅎ
°C와 Weather Desciption 구현
날씨 위젯의 핵심 기능을 구현해보겠습니다.
index.html
1
2
3
4
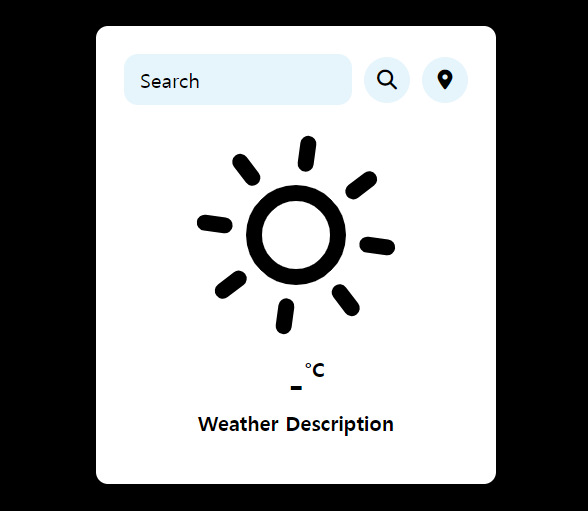
<div class="weather-box">
<p class="temperature">-<sup>°C</sup></p>
<p class="description">Weather Description</p>
</div>
weather-body 클래스 내부, weather-icon 캔버스 아래에 weather-box클래스를 만들어 주었습니다.
p요소가 temperature, description를 갖도록 했고, 초기 온도를 -°C로, 날씨 설명란에는 Weather Description으로 표기해서 초기 화면 세팅을 했습니다.
style.css
1
2
3
4
5
6
7
8
9
10
11
12
13
14
15
16
17
18
19
20
21
22
23
.weather-box {
    margin-block: 20px;
    text-align: center;
}

.weather-box .temperature {
    font-size: 40px;
    font-weight: 800;
    position: relative;
}

.weather-box .temperature sup {
    font-size: 20px;
    position: absolute;
    font-weight: 600;
}

.weather-box .description {
    font-size: 20px;
    font-weight: 700;
    text-transform: capitalize;

}
다음으로 style.css 코드입니다.
weather-box 요소의 폰트 크기와 두께, 위치, 텍스트 정렬 및 변환을 설정해 줍니다.
구현 결과
습도와 풍속 기능 구현
다음으로 습도와 풍속을 weather-box 클래스 아래에 표현하도록 하겠습니다.
index.html #1
1
2
3
4
5
6
7
8
9
10
11
12
13
14
15
16
<div class="wether-details">
    <div class="humidity">

        <div class="text">
            <span id="humidity">-%</span>
            <p>Humidity</p>
        </div>
    </div>
    <div class="wind">

        <div class="text">
            <span id="wind-speed">-km/h</span>
            <p>Wind Speed</p>
        </div>
    </div>
</div>
weather-details 클래스를 만들고, humidity, wind-speed를 표현해 준 후,
Font Awesome 사이트에서 물방울 아이콘과 바람 아이콘을 가져와줄께요!
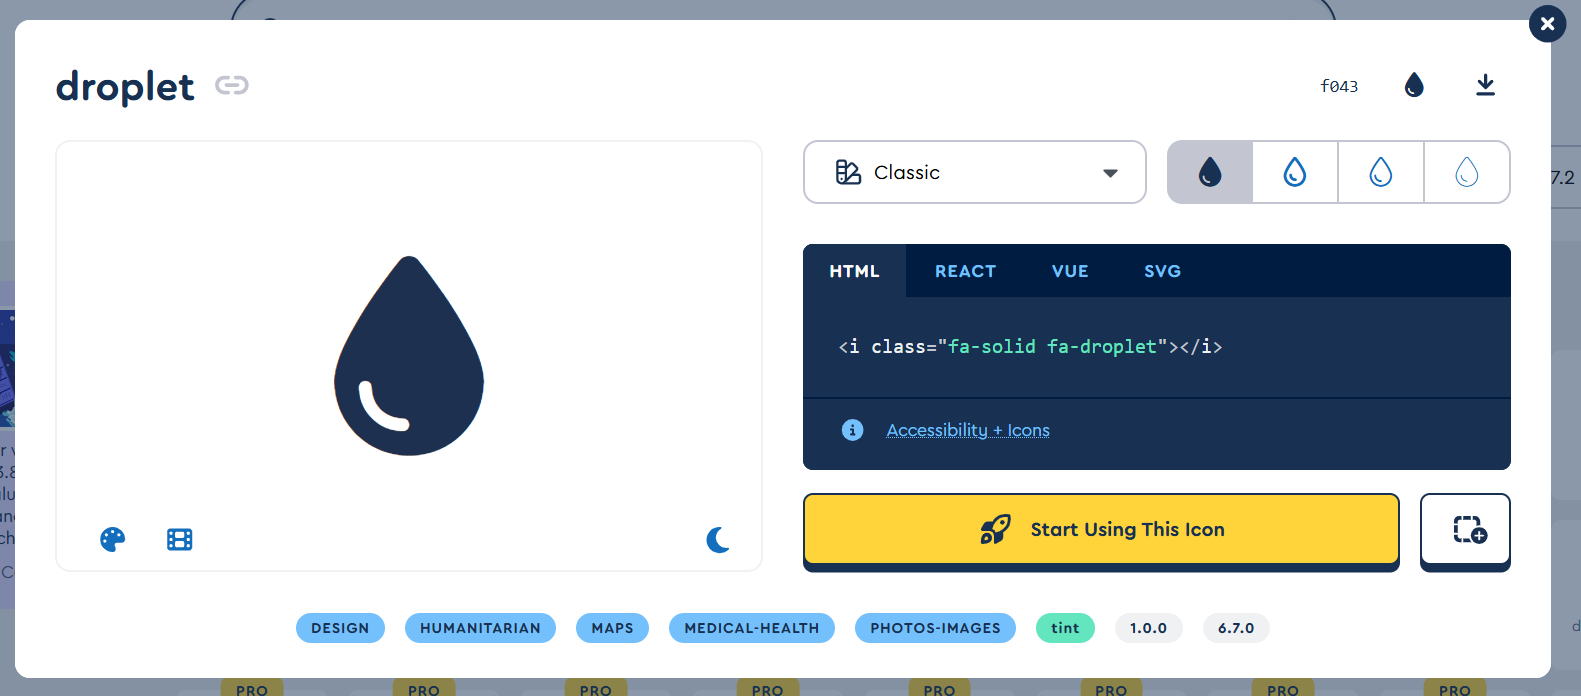

저는 이 아이콘들로 선택했어요. 오른쪽에 있는 html 코드를 복사해서 붙여 넣습니다. 아래 코드와 같이 작성하시면 됩니다.
index.html #2
1
2
3
4
5
6
7
8
9
10
11
12
13
14
15
16
<div class="wether-details">
    <div class="humidity">
        <i class="fa-solid fa-droplet"></i>
        <div class="text">
            <span id="humidity">-%</span>
            <p>Humidity</p>
        </div>
    </div>
    <div class="wind">
        <i class="fa-solid fa-wind"></i>
        <div class="text">
            <span id="wind-speed">-km/h</span>
            <p>Wind Speed</p>
        </div>
    </div>
</div>
구현 결과
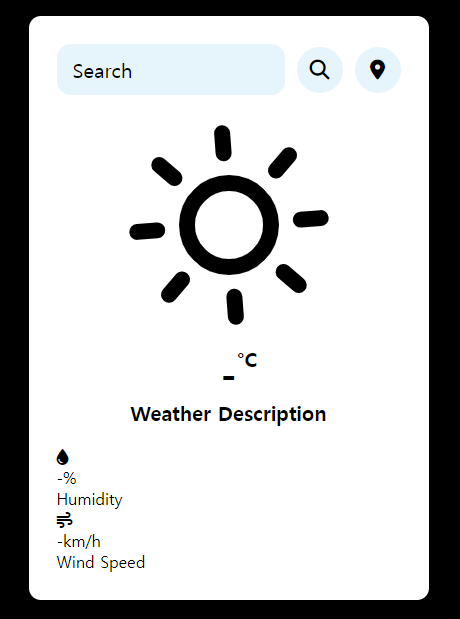
물방울 아이콘과 바람 아이콘이 잘 구현이 되었고, 초기 화면 세팅도 거의 다 완료된 것 같아요🥳🥳
이제 레이아웃만 적절히 설정해 줍시다!
style.css
1
2
3
4
5
6
7
8
9
10
11
12
13
14
15
16
17
18
19
20
21
22
23
24
25
26
27
28
29
30
31
32
33
34
35
.wether-details {
    width: 100%;
    display: flex;
    justify-content: space-between;
    margin-top: 20px;
}

.humidity,
.wind {
    display: flex;
    align-items: center;
}

.humidity {
    margin-left: 20px;
}

.wind {
    margin-right: 20px;
}

.wether-details {
    font-size: 36px;
}

.wether-details .text {
    margin-left: 10px;
    font-size: 16px;
}

.text span {
    font-size: 20px;
    font-weight: 700;

}
flexbox 레이아웃을 통해서 humidity와 wind를 수평으로 배치했고, 각 요소의 여백과 폰트 크기를 조정한 코드에요!
구현 결과
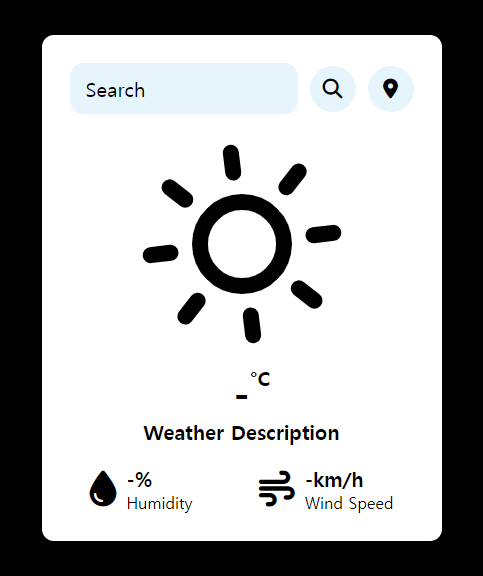
코드를 작성하시면 이렇게 깔끔한 초기 화면을 만드실 수 있습니다😊
다음 시간에는 날씨 검색 기능과 날씨를 가져와서 화면에 출력하는 기능을 코딩해보겠습니다.
글 읽어주셔서 감사합니다!