간단한 날씨 위젯 코딩 #3 [날씨 검색 기능 구현 / Java Script 미니 프로젝트]
안녕하세요🖐️
지금까지 만든 날씨 위젯은 아직 아무런 기능 구현이 되지 않았죠?
오늘은 날씨를 검색하면 실제로 날씨가 출력될 수 있도록 기능 구현 작업을 해주도록 할께요😁
DOM 요소 선택 및 변수 할당
script.js
1
2
3
4
5
6
7
const inputBox = document.querySelector(".input-box");
const searchBtn = document.getElementById('searchBtn');
const locationBtn = document.getElementById('locationBtn');
const temperature = document.querySelector('.temperature');
const description = document.querySelector('.description');
const humidity = document.getElementById('humidity');
const wind_speed = document.getElementById('wind-speed');
먼저 script.js 파일에 변수를 할당해주도록 할게요. 이 코드를 파일의 가장 윗부분에 입력합니다.
OpenWeatherMap API
날씨 데이터를 가져와서 날씨 위젯에 표현하려면 API를 활용해야 합니다!
저는 OpenWeatherMap API를 사용했습니다. API를 사용하기 위해 우선 아래 사이트 회원 가입을 해주세요
회원 가입을 하고 자신의 API Key를 복사합니다.
다음으로 상단 배너의 API => Current Weather Data의 API doc를 들어가면
Built-in API request by city name가 나옵니다. (한참 내려야 합니다😂)
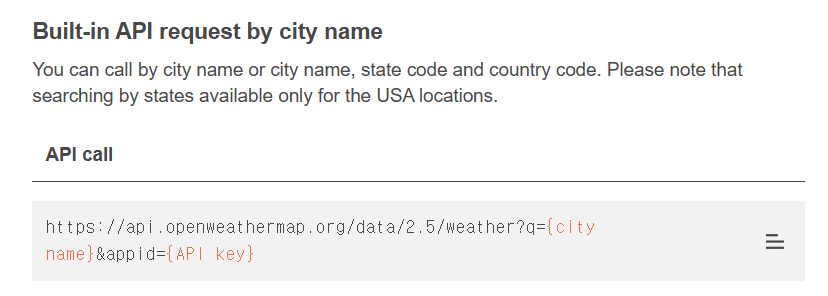
API를 call할 수 있는 URL도 복사해 줍니다!
script.js
1
2
3
4
5
6
7
8
9
10
11
12
13
14
15
16
17
async function checkWeather(city) {
    const api_key = "당신의 API key";
    const url = `https://api.openweathermap.org/data/2.5/weather?q=${city}&appid=${api_key}`;
    const weather_data = await fetch(`${url}`).then(response => response.json());

    console.log(weather_data)
}

searchBtn.addEventListener('click', () => {
    checkWeather(inputBox.value);
});

inputBox.addEventListener('keypress', (event) => {
    if (event.key === "Enter") {
        checkWeather(inputBox.value);
    }
});
사용자가 도시 이름을 입력하면, OpenWeatherMap API를 호출해서 날씨 데이터를 가져옵니다.
url 변수가 API 호출을 위한 URL을 생성하고 api_key 변수가 API를 호출할 때 인증을 합니다.
fetch 함수는 지정된 URL로 HTTP 요청을 보내고 완료될 때까지 await로 기다렸다가 응답 객체를 JSON 형식으로 변환하는 함수입니다.
또한 검색 버튼이 눌렸을 때, 엔터 키가 입력되었을 때 checkWeather 함수를 호출하는 코드를 작성해 주었습니다!
console 창 출력 결과
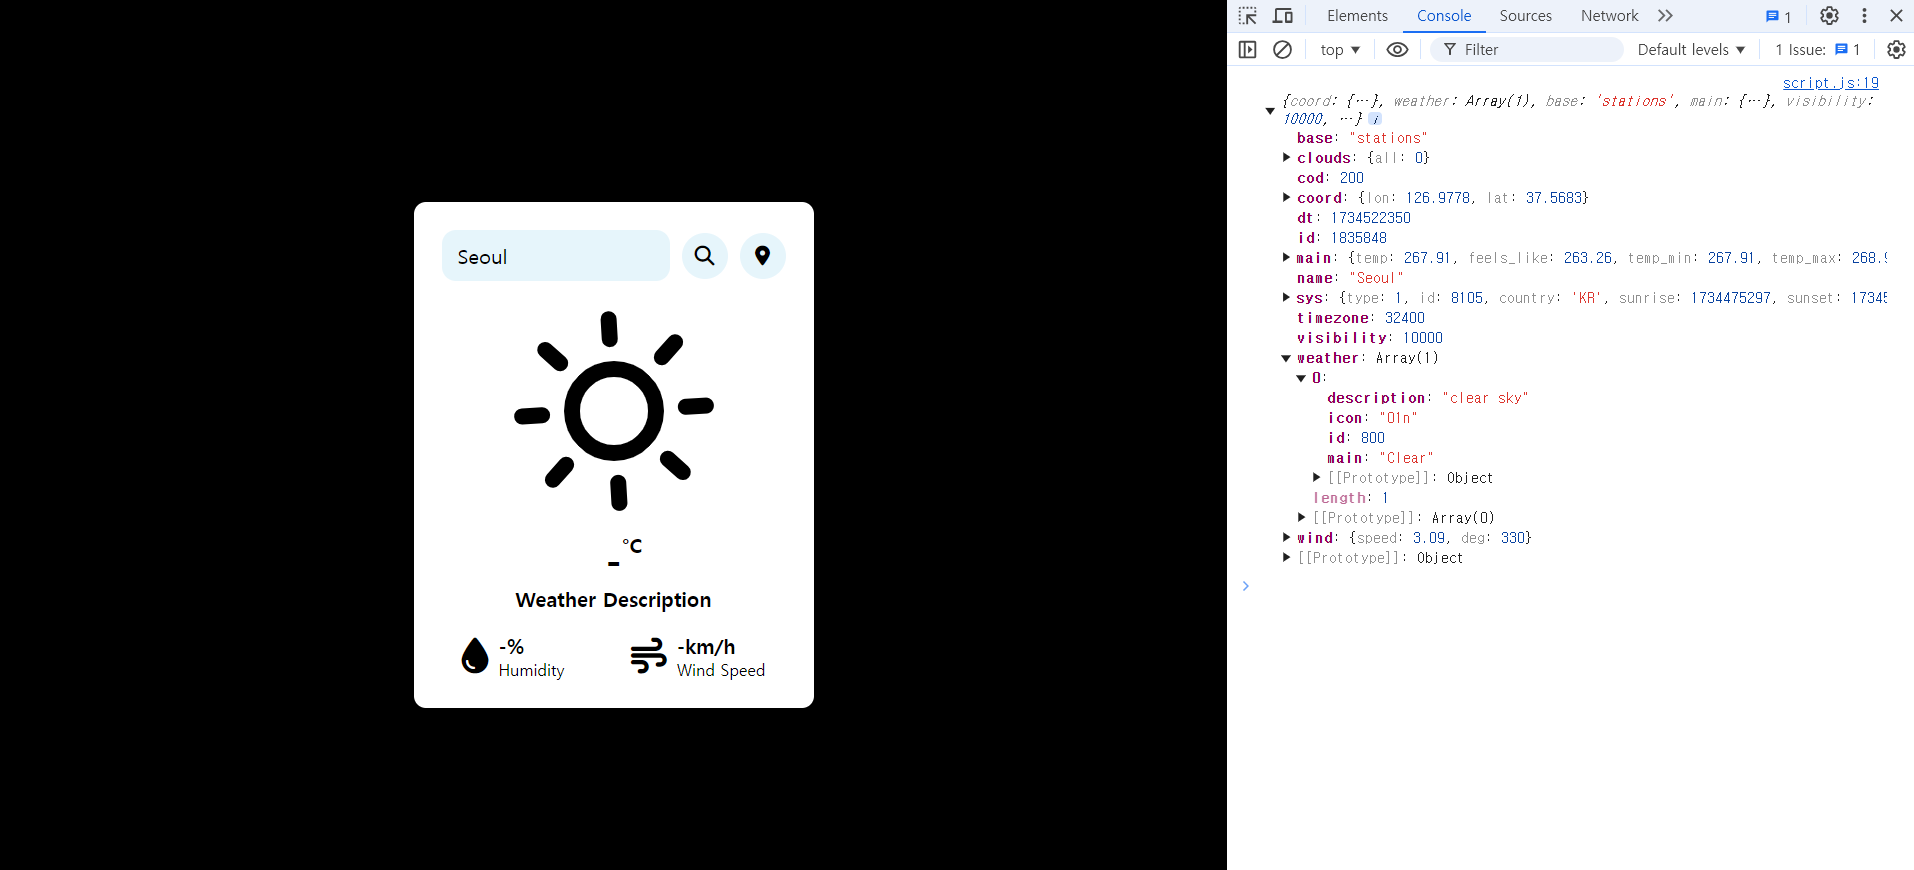
서울을 검색한 후 console 창을 열어보았습니다.
API 호출이 완벽하게 잘 되었네요!
다음으로 console 창에 출력된 내용을 바탕으로 Data Mapping을 해야 됩니다.
Data Mapping
script.js #1
1
2
3
4
temperature.innerHTML = `${Math.round(weather_data.main.temp - 273.15)}°C`;
description.innerHTML = `${weather_data.weather[0].description}`;
humidity.innerHTML = `${weather_data.main.humidity}%`;
wind_speed.innerHTML = `${weather_data.wind.speed}km/h`;
checkWeather 함수에 위 코드를 작성했어요😊
weather_data.main.temp는 API로부터 받은 온도 데이터로, 켈빈(Kelvin) 단위입니다.
켈빈을 섭씨로 변환하고 반올림하기 위해 Math.round(weather_data.main.temp - 273.15)를 사용했습니다.
구현 결과
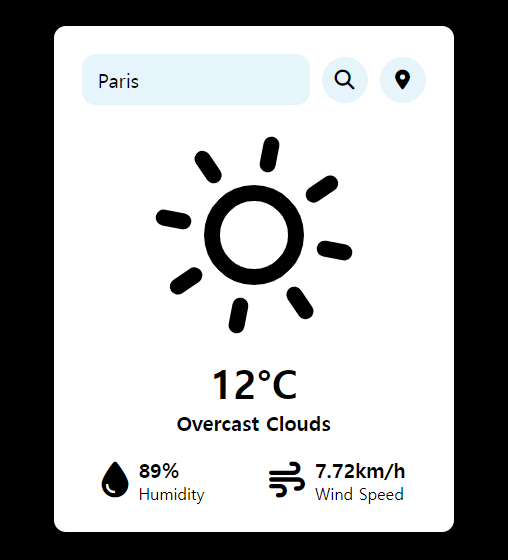
프랑스 파리를 검색해보았습니다.
날씨의 상세 설명과 온도, 습도, 풍속 모두 잘 나옵니다!!
근데 설명은 분명 Overcast Clouds인데 Skycon은 해 아이콘이 나오네요…
아이콘도 잘 나타나도록 수정해보겠습니다.
script.js #2
1
2
3
4
5
6
7
8
9
10
11
12
13
14
15
16
17
18
19
20
21
22
23
24
25
26
27
28
29
30
31
32
33
34
async function checkWeather(city) {
    const api_key = "당신의 API key";
    const url = `https://api.openweathermap.org/data/2.5/weather?q=${city}&appid=${api_key}`;
    const weather_data = await fetch(`${url}`).then(response => response.json());

    temperature.innerHTML = `${Math.round(weather_data.main.temp - 273.15)}°C`;
    description.innerHTML = `${weather_data.weather[0].description}`;
    humidity.innerHTML = `${weather_data.main.humidity}%`;
    wind_speed.innerHTML = `${weather_data.wind.speed}km/h`;

    let weatherType = weather_data.weather[0].main.toLowerCase();

    switch (weatherType) {
        case 'clouds':
            icons.set("weather-icon", Skycons.CLOUDY);
            break;
        case 'clear':
            icons.set("weather-icon", Skycons.CLEAR_DAY);
            break;
        case 'rain':
            icons.set("weather-icon", Skycons.RAIN);
            break;
        case 'mist':
            icons.set("weather-icon", Skycons.FOG);
            break;
        case 'snow':
            icons.set("weather-icon", Skycons.SNOW);
            break;
        default:
            icons.set("weather-icon", Skycons.CLEAR_DAY);
    }

    icons.play();
}
switch문을 통해서 여러 날씨 별로 표현되는 아이콘을 각기 다르게 설정해주었습니다!
구현 결과
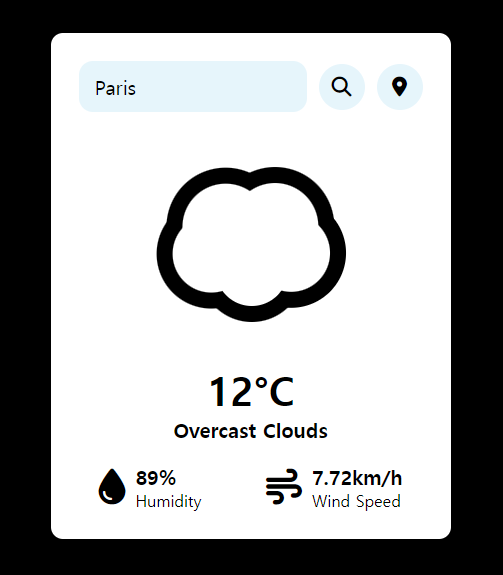
구름 모양이 잘 나왔네요☁️☁️
다음 시간에는 위치를 기반으로 날씨를 출력하는 기능을 코딩하겠습니다.
수고하셨어요👏👏